


Direct to Film (DTF) printing revolutionizes design transfer by directly applying designs onto various materials via high-precision ink deposition onto film. Choosing the right film type and file format is crucial for optimal design quality and longevity, with polyester and vinyl offering distinct advantages. The DTF process involves artistic design software, digital preparation, printing, curing, and post-print treatments, followed by meticulous application techniques to ensure vibrant, crisp, long-lasting transfers suitable for diverse surfaces.
Discover the art of DTF (Direct to Film) printing—a cutting-edge process for creating stunning design transfers. This comprehensive guide unravels the secrets, from selecting the ideal film for your unique designs to mastering print preparation and intricate post-print treatments. Learn how this technology revolutionizes application techniques on various substrates, offering both precision and versatility. Get ready to explore a world where design possibilities are truly limitless!
- Understanding DTF (Direct to Film) Printing: A Brief Overview
- Choosing the Right Film for Your Design Transfer
- Preparing Your Design for Print: File Format and Resolution
- The Printing Process: From Setup to Output
- Post-Print Treatment: Curing and Finishing the Film
- Applying the Film to Substrates: Techniques and Tips
Understanding DTF (Direct to Film) Printing: A Brief Overview
Direct to Film (DTF) printing is a cutting-edge technique that has revolutionized the way we approach design transfer. Unlike traditional methods, DTF allows for the direct application of designs onto various materials, including special films, without the need for intermediate surfaces or complex processes. This innovative approach streamlines the production process, making it faster and more efficient.
The DTF printing process involves several key steps: first, the design is digitally prepared and optimized for printing. Then, a specialized printer uses precise inks to directly deposit the design onto the film, creating a high-resolution, long-lasting image. This method ensures superior quality and accuracy, enabling intricate details and vibrant colors to be captured flawlessly on the final product.
Choosing the Right Film for Your Design Transfer

Choosing the right film is a crucial step in the Direct-to-Film (DTF) transfer process, as it directly impacts the quality and longevity of your design. Different types of films are designed for specific applications, so understanding their properties is essential. For instance, polyester-based films are popular choices due to their durability and ability to adhere well to various surfaces. These films are ideal for high-quality prints intended for outdoor use or items that will undergo frequent handling. On the other hand, vinyl films offer a more affordable option, suitable for simple designs and indoor applications where longevity is less of a concern.
When selecting film, consider factors like resolution, color accuracy, and opacity. High-resolution films ensure sharp details in your design, while transparent or opaque films allow for precise control over the final transfer’s look. Additionally, some films come with special coatings that enhance their adhesion, weather resistance, or UV protection, making them suitable for different environments and purposes.
Preparing Your Design for Print: File Format and Resolution

When preparing your design for printing on special film for transfers, selecting the right file format and ensuring optimal resolution is paramount. For DTF (Direct to Film) printing, vector formats like AI (Adobe Illustrator) or EPS (Encapsulated PostScript) are ideal due to their precision and ability to maintain sharp details at any scale. These formats allow for clean lines, curves, and shapes, which is crucial for intricate designs.
Resolution plays a significant role in the final print quality. For DTF transfers, a minimum resolution of 300 DPI (dots per inch) is recommended. This ensures that your design will be crisp and detailed when printed on the film. Lower resolutions may result in pixelation or blurriness, especially in areas with fine lines or gradients. Therefore, it’s essential to check and adjust your design settings to meet these requirements before sending your file for printing.
The Printing Process: From Setup to Output
The printing process for DTF (Direct to Film) transfers involves several precise steps to ensure optimal results. It begins with setting up the design software, where graphic artists create or import the desired artwork, ensuring it meets the specifications for the specific film type and application. This digital file is then prepared for printing, incorporating elements like color profiles, resolution, and cutting paths to achieve accurate reproduction on the film.
Once the digital preparation is complete, the actual printing process kicks in. The special film is fed into the printer, and inkjet or laser technology is utilized to transfer the design precisely onto the film. This step demands precision and high-quality equipment to maintain consistent color accuracy and sharp details. After printing, the film goes through a curing process to set the ink, ensuring long-lasting durability for subsequent transfers to various materials.
Post-Print Treatment: Curing and Finishing the Film

After printing, the special film requiring DTF (Direct-to-Film) transfer needs proper post-print treatment to ensure optimal results. The first step is curing, where the printed film is exposed to specific light conditions or heated to set the design permanently onto the film. This process varies depending on the type of ink and film used, with some requiring UV light exposure while others use heat presses. Curing ensures that the colors remain vibrant and the design is durable for subsequent transfer processes.
Once cured, the film undergoes various finishing techniques to achieve a smooth, ready-to-apply surface. This might involve trimming excess material, laminating for added protection, or applying release agents to facilitate easy removal during application. These finishing touches are crucial in ensuring the film’s ease of use and long-term performance when transferred to various materials like fabric, wood, or metal.
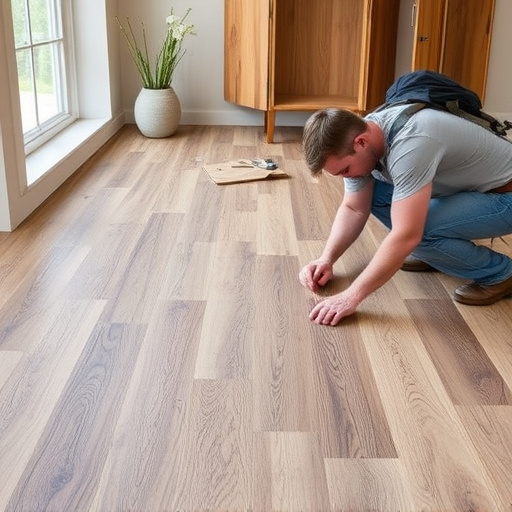
Applying the Film to Substrates: Techniques and Tips
Applying film to substrates in direct-to-film (DTF) printing is a crucial step that demands precision and technique. The process begins with ensuring the substrate, whether it’s fabric, wood, or plastic, is clean, dry, and free from any contaminants. This foundation is essential for achieving high-quality prints. Next, the special film, pre-loaded with your design, is carefully unrolled and aligned precisely over the substrate.
Various techniques can be employed, such as using a squeegee for even application or air pressure to ensure complete contact between the film and surface. Proper alignment is key; any misalignment will result in a distorted print. Additionally, heating the substrate slightly before application can help improve adhesion. This process requires patience and practice to master, ensuring the final transfer is vibrant, crisp, and long-lasting.